Ionic Beers
Ionic Beers is a tutorial of the Beer Tutorials series. In this tutorial we will create a simple app that queries a beer catalog and displays a list of beers.
Getting Started
Install NodeJS and then using the node package manager (npm), install ionic.
npm install -g ionic
After installing ionic, create a new project called ionic-beers.
ionic start ionic-beers blank
Navigate to the project directory and add the mobile development platform.
ionic platform add android
Run the application on the Android emulator.
ionic emulate android
Run the application on desktop browser
ionic serve --lab
Note: To run the application in the Android emulator, you need to have the Android SDK installed and configured on your computer. The easiest way to do it is to install Android Studio for your platform.
If you have issues while initializing the app, read carefully these instructions

Project Structure
.
└── ionic-beers
    ├── www
    │   ├── css
    │   │   └── style.css
    │   ├── img
    │   │   └── ionic.png
    │   ├── js
    │   │   └── app.js
    │   ├── lib
    │   │   └── ionic
    │   │       └── ...
    │   └── index.html
    ├── hooks
    │   ├── after_prepare
    │   │   └── ...
    │   └── README.md
    ├── resources
    │   ├── android
    │   │   └── ...
    │   ├── ios
    │   │   └── ...
    │   ├── icon.png
    │   └── splash.png
    ├── scss
    │   └── ionic.app.scss
    ├── package.json
    ├── bower.json
    ├── config.xml
    ├── gulpfile.js
    ├── ionic.project
    └── platforms
        ├── android
        └── ios
Inside the project folder there are 4 sub-folders: hooks, scss, platforms and www. The application source code resides in the www folder. Application code is written using AngularJS and Javascript.
Inside the www folder is a file called index.html which has the default application code. Finally app.js contains the code to start the application with the defined modules.
Designing the app
Let’s start by removing unused lines in application. Open index.html and look at the default code. Remove lines between the body tags. The body tag has an attribute called ng-app which references the application.
This project will use a navigation view to design our app.
Inside the body tag add the navigation view.
<ion-nav-view></ion-nav-view>
Create a new directory in the www directory named templates. In this new directory, create a new file named menu.html. In this file, you would use a ion-menu directive. Open menu.html and add lines
<ion-side-menus>
  <ion-side-menu-content>
    <ion-nav-bar class="bar-dark">
      <ion-nav-back-button></ion-nav-back-button>

      <ion-nav-buttons side="left">
        <button class="button button-icon button-clear ion-navicon" menu-toggle="left"></button>
      </ion-nav-buttons>
    </ion-nav-bar>

    <ion-nav-view name="menuContent"></ion-nav-view>
  </ion-side-menu-content>

  <ion-side-menu side="left">
    <ion-header-bar class="bar-dark">
      <h1 class="title">Menu</h1>
    </ion-header-bar>

		<ion-content>
			<ul class="list">
				<a href="#/event/home" class="item" menu-close>Home</a>
				<a href="#/event/beers" class="item" menu-close>Beers list</a>
			</ul>
		</ion-content>
  </ion-side-menu>
</ion-side-menus>
Create a new file in templatesdirectory named home.html. Open home.html and add lines
<ion-view view-title="Ionic Beers">
	<ion-content class="padding">
		Welcome!
	</ion-content>
</ion-view>
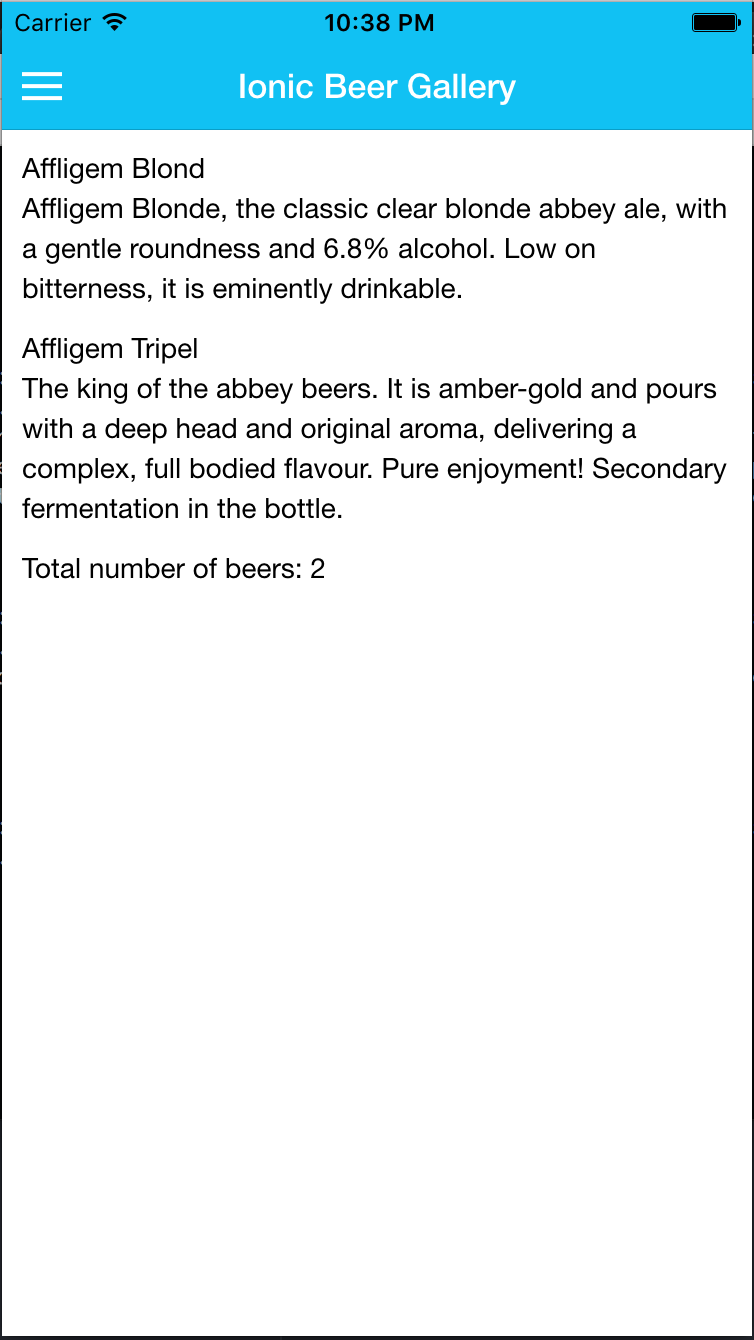
Create a new file in templates directory called listBeers.html
<ion-view view-title="Ionic Beer Gallery">
	<ion-content class="padding">
		<ul>
	      <li>
	        <span>Affligem Blond</span>
	        <p>
	          Affligem Blonde, the classic clear blonde abbey ale, with a gentle roundness and 6.8% alcohol.
	          Low on bitterness, it is eminently drinkable.
	        </p>
	      </li>
	      <li>
	        <span>Affligem Tripel</span>
	        <p>
	          The king of the abbey beers. It is amber-gold and pours with a deep head and original aroma,
	          delivering a complex, full bodied flavour. Pure enjoyment! Secondary fermentation in the bottle.
	        </p>
	      </li>
	    </ul>

		<p>Total number of beers: 2</p>
  </ion-content>
</ion-view>
Open app.js to define routes
.config(function ($stateProvider, $urlRouterProvider) {

    $stateProvider
    .state('eventmenu', {
      url: '/event',
      abstract: 'true',
      templateUrl: 'templates/menu.html'
    })
    .state('eventmenu.home', {
        url: '/home',
        views: {
          'menuContent': {
            templateUrl: 'templates/home.html'
          }
        }
    })
    .state('eventmenu.beers', {
        url: '/beers',
        views: {
          'menuContent': {
            templateUrl: 'templates/listBeers.html'
          }
        }
    });

    $urlRouterProvider.otherwise('/event/home');
})
Save changes and run the app. It should look this way.
Fetching data from Beer catalog
Create a new file js directory called controllers.js
angular.module('ionicbeers')

.controller('BeersCtrl', ['$scope', function($scope) {
    $scope.beers = [
      {
        "alcohol": 8.5,
        "name": "Affligem Tripel",
        "description": "The king of the abbey beers. It is amber-gold and pours with a deep head and original aroma, delivering a complex, full bodied flavour. Pure enjoyment! Secondary fermentation in the bottle."
      },
      {
        "alcohol": 9.2,
        "name": "Rochefort 8",
        "description": "A dry but rich flavoured beer with complex fruity and spicy flavours."
      },
      {
        "alcohol": 7,
        "name": "Chimay Rouge",
        "description": "This Trappist beer possesses a beautiful coppery colour that makes it particularly attractive. Topped with a creamy head, it gives off a slight fruity apricot smell from the fermentation. The aroma felt in the mouth is a balance confirming the fruit nuances revealed to the sense of smell. This traditional Belgian beer is best savoured at cellar temperature "
      }
    ];
  }])
  ```

This controller defines a list of beers returned to the Angular scope.

Open `index.html` and and declare the new controller
Open `app.js` file and add the BeersCtrl to the beer menu item
.state(‘eventmenu.beers’, { url: ‘/beers’, views: { ‘menuContent’: { templateUrl: ‘templates/listBeers.html’, controller: ‘BeersCtrl’ } } }); ```
Open listBeers.html and replace lines between ion-content tag with those lines
<ul class="list">
    <li ng-repeat="beer in beers">
      <span></span>
      <p></p>
    </li>
</ul>

<p>Total number of beers: </p>
Translate labels
Now the application needs to be translated for users all around the world. For this, add angular-translate library with this command and update bower configuration
bower install angular-translate-loader-static-files --save
Open app.js file and update
angular.module('ionicbeers', ['ionic','pascalprecht.translate'])
and add lines after $urlRouterProvider
// Translate labels / title / menus
$translateProvider.useSanitizeValueStrategy('escape');
$translateProvider.useStaticFilesLoader({
    prefix: 'languages/',
    suffix:'.json'
});
$translateProvider
.registerAvailableLanguageKeys(['en','fr'], {
    'en_US': 'en',
    'en_UK': 'en',
    'fr_FR': 'fr',
    'fr_BE': 'fr'
})
.determinePreferredLanguage();

$translateProvider.use();
Open index.html and add lines to link script
<script src="lib/angular-translate/angular-translate.js"></script>
<script src="lib/angular-translate-loader-static-files/angular-translate-loader-static-files.js"></script>
Create new files that contain translated labels in a new directory languages, for example en.json
{
	"menu" : "Menu",
	"home" : "Home",
	"beersList" : "List of beers",
	"beerGallery" : "Ionic Beer Gallery",
	"beersNumbers" : "Total number of beers",
	"content" : "Welcome!",
	"ionicBeers" : "Ionic Beers"
}
Update home.html file to translate labels
content
Change all labels in *.html files to translate labels
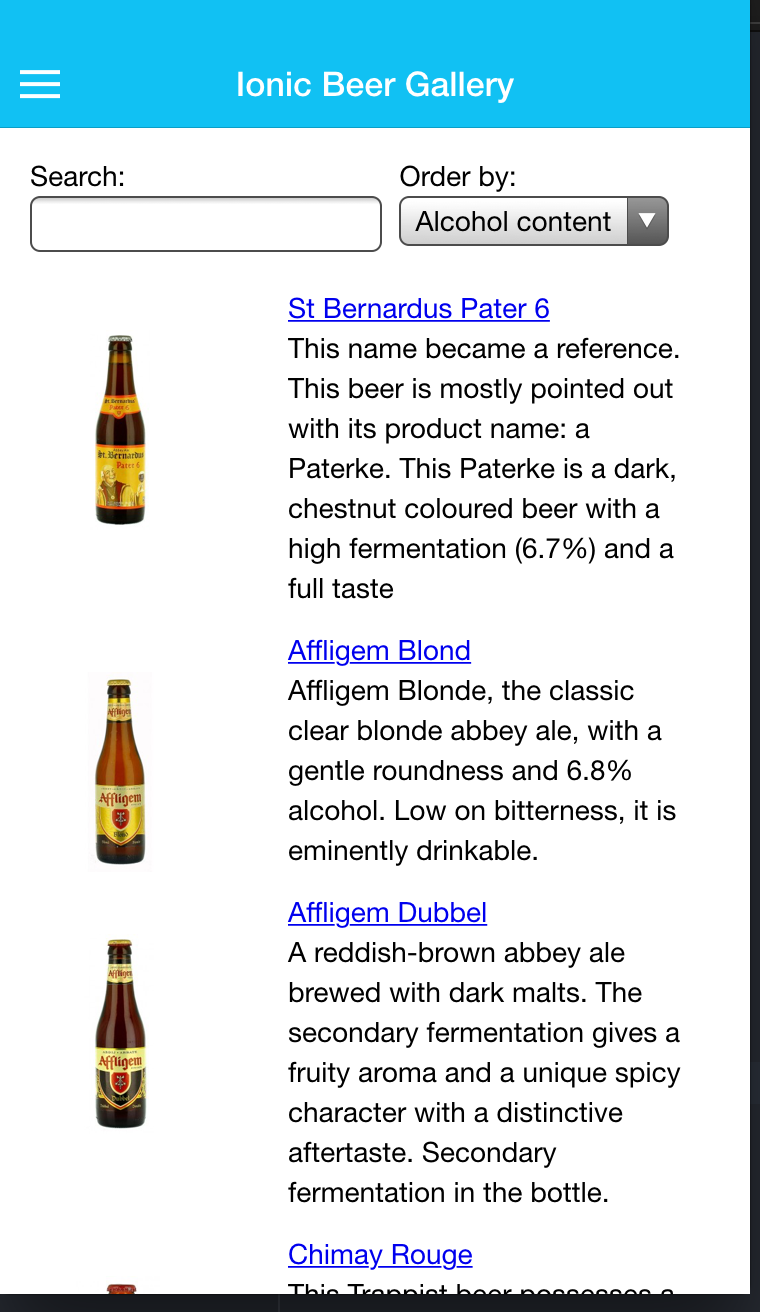
Order and search in list
Sometimes the list need to be ordered. AngularJS do this with easy directives.
Add lines in controllers.js file after beers list initialization
$scope.orderProp = 'alcohol';
Open listBeers.html and add lines to filter beers
<div>
  search: <input ng-model="query">
</div>
Add lines to sort beers
<div>
  sortBy:
  <select ng-model="orderProp">
    <option value="name">alphabetical</option>
    <option value="alcohol">alcoholContent</option>
  </select>
</div>
After, add filter and sorter to the ng-repeat directive
<li ng-repeat="beer in beers | filter:query | orderBy:orderProp">
Loading beers from JSON files
Add $http service in the controller definition and replace initialization of beers list with loading JSON files
$http.get('beers/beers.json').success(function(data) {
  $scope.beers = data;
});
Getting the beers pics
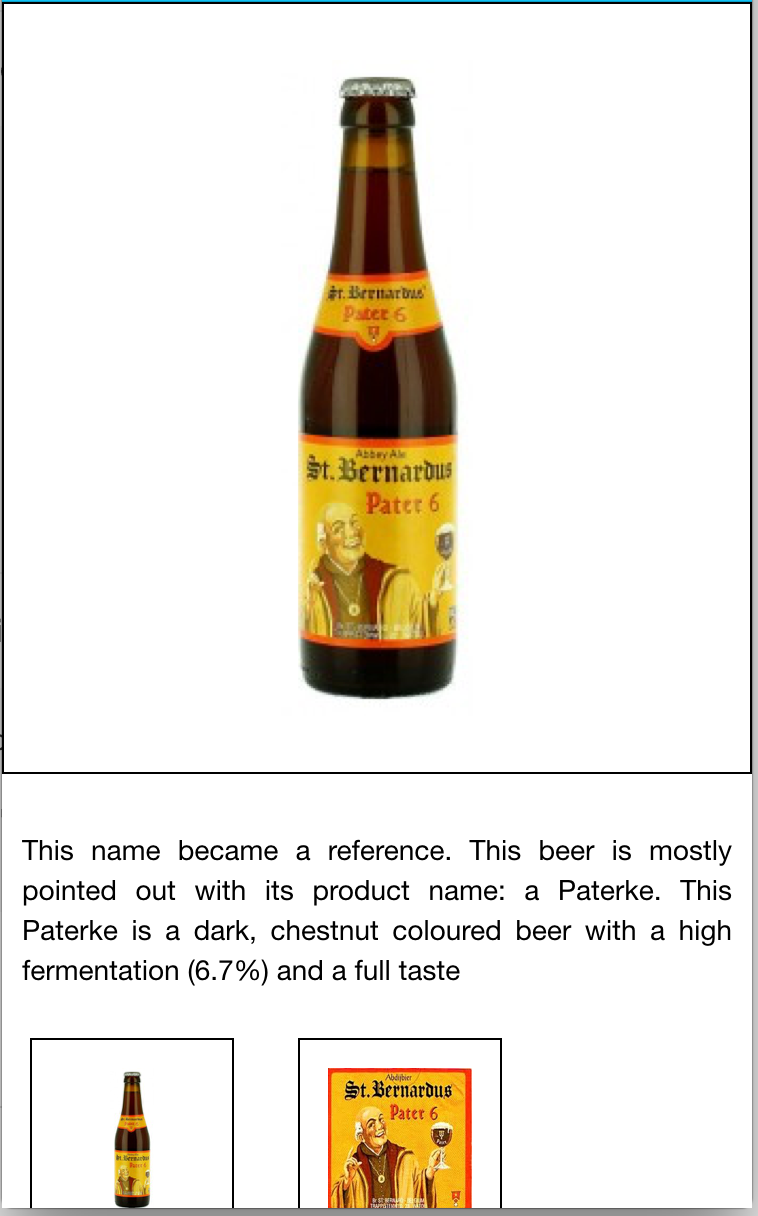
We can also extract the image URL from the received JSON and then we add the image to the listBeers.html:
<a href="#/beers/"><img ng-src="" class="thumb-img"></a>
<div class="thumb">
<a href="#/beers/"></a>
<p></p>
</div>
Let’s display the beer description
On the beers list listBeers.html, add action on beer name and on picture
<img ng-src="" class="thumb-img" ng-click="openModal(beer.id)">
<a href="" ng-click="openModal(beer.id)"></a>
Now create new file beer-detail.html to display beer description
<ion-modal-view>
	<ion-header-bar align-title="left" class="bar-calm">
		<h1 class ="title"></h1>
		<button class="button icon ion-close" ng-click="closeModal()"></button>
	</ion-header-bar>

	<ion-content>
		<img ng-src="" class="beer">
		<p class="description"></p>

		<ul class="beer-thumbs">
		  <li>
		    <img ng-src="" ng-click="setImage(beer.img)">
		  </li>
		  <li>
		    <img ng-src="" ng-click="setImage(beer.label)">
		  </li>
		</ul>

		<ul class="specs">
		  <li>
		    <dl>
		      <dt>alcoholContent</dt>
		      <dd></dd>
		    </dl>
		  </li>
		  <li>
		    <dl>
		      <dt>brewery</dt>
		      <dd></dd>
		    </dl>
		  </li>
		  <li>
		    <dl>
		      <dt>availability</dt>
		      <dd></dd>
		    </dl>
		  </li>
		  <li>
		    <dl>
		      <dt>style</dt>
		      <dd></dd>
		    </dl>
		  </li>
		  <li>
		    <dl>
		      <dt>serving</dt>
		      <dd></dd>
		    </dl>
		  </li>
		</ul>
	</ion-content>
</ion-modal-view>
Define modal to display beer detail in controllers.js
$ionicModal.fromTemplateUrl('templates/beer-detail.html', {
  scope: $scope,
  animation: 'slide-in-up'
}).then(function(modal) {
  $scope.beerModal = modal;
});
Load beer definition from JSON file in controllers.js
$scope.openModal = function(beerId) {
  $http.get('beers/' + beerId + '.json').success(function(data) {
    $scope.beer = data;
    $scope.mainImg = $scope.beer.img;

    $scope.setImage = function(img) {
      $scope.mainImg = img;
    }
  });
  myBeerId = beerId;
  $scope.beerModal.show();
};
Hide modal when click on close button in controllers.js
$scope.closeModal = function() {
  $scope.beerModal.hide();
};

$scope.$on('$destroy', function() {
  $scope.beerModal.remove();
});