NativeScript Beers is a tutorial of the Beer Tutorials series. In this tutorial we will create a simple app that queries a beer catalog and displays a list of beers.
Getting Started
Install NodeJS and then using the node package manager (npm), install native script.
npm install -g nativescript
After installing native script, create a new project called nativescript-beers.
tns create nativescript-beers
Navigate to the project directory and add the mobile development platform.
tns platform add android
Run the application on the Android emulator.
tns run android --emulator
Note: To run the application in the Android emulator, you need to have the Android SDK installed and configured on your computer. The easiest way to do it is to install Android Studio for your platform.
If you find issues while initializing the app, read carefully these instructions
The tns livesync command instantly transfers XML, CSS, and JavaScript files to a running NativeScript app. If you set the command’s --watch flag (tns livesync ios --emulator --watch or tns livesync android --emulator --watch), the NativeScript CLI will watch your app for changes, and apply those changes automatically after you save files. Be warned, however, that the livesync command currently does not show console.log() output or stack traces. So during debugging you may want to switch back to tns run or use adb logcat in parallel to get logs directly from the android emulator.
Project Structure
.
└── nativescript-beers
    ├── app
    │   ├── App_Resources
    │   │   ├── Android
    │   │   └── iOS
    │   ├──  main-page.js
    │   ├──  main-page.xml
    │   ├──  main-view-model.js
    │   ├──  package.json
    │   ├──  references.d.ts
    │   ├── app.css
    │   ├── app.js
    │   └── ...
    ├── node_modules
    │   └── tns-core-modules
    ├── package.json
    └── platforms
        ├── android
        └── ios
Inside the project folder there are 3 sub-folders: app, node_modules and platforms :
app: This folder contains all the development resources you need to build your app. You’ll be spending most of your time editing the files in here.node_modules: This folder contains your app’s npm module dependencies. All new NativeScript projects start with a single dependency on tns-core-modules.node_modules/tns-core-modules: This folder contains your app’s NativeScript modules, which are a series of NativeScript-provided JavaScript modules you’ll use to build your app. Each module contains the platform-specific code needed to implement some feature—the camera, http calls, the file system, and so forth—exposed through a platform-agnostic API (e.g. camera.takePicture()). We’ll look at some examples momentarily.package.json: This file contains your app’s configuration details, such as your app id, the version of NativeScript you’re using, and also which npm modules your app uses. We’ll take a closer look at how to use this file when we talk about using npm modules in chapter 5.platforms: This folder contains the platform-specific code NativeScript needs to build native iOS and Android apps. For example in the android folder you’ll find things like your project’s AndroidManifest.xml and .apk executable files. Similarly, the ios folder contains the Groceries’ Xcode project and .ipa executables. Note, users on Windows machines will not have an ios folder.
Application code is written using JavaScript and the user interface designed using XML. Inside the app folder is a file called main-page.xml which has the default user interface code. In main-view-model.js is the default model code and main-page.js defines the application logic. Finally app.js contains the code to start the application with the defined modules.
Designing the app
Let’s start by designing the application using XML. Open main-page.xml and look at the default code. Remove everything except the Page tag. The Page tag has an attribute called loaded which executes the pageLoaded function once the app loads. The pageLoaded function is inside the main-page.js file.
This project will use a stack layout to design our app. There are a number of layouts offered by native script.
Inside the Page tag add the stack layout.
    <StackLayout orientation="vertical">
    </StackLayout>
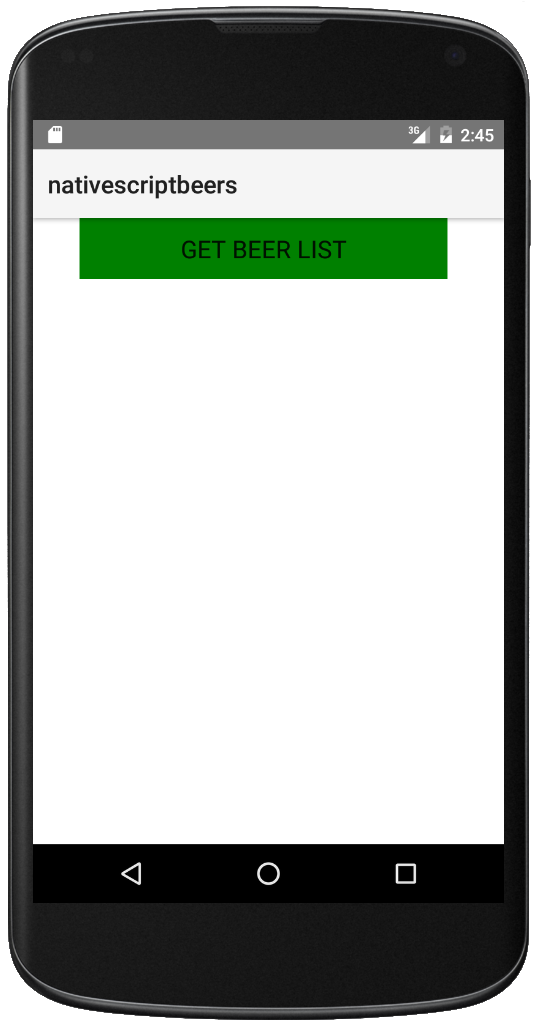
Define the stack layout with a vertical orientation. Add a button inside the stack layout.
<Button text="Get beer list" height="50px" style="width:300px;border:none;font-size:20px;" />
Save changes and run the app. It should look something like the below.
Fetching data from Beer catalog
Add an attribute called tap to the Get beer list button.
tap="beers"
Now, when the user taps the search button the beers function is called.
Let’s define the beers function inside main-page.js.
    exports.beers = function() {
      // Code would be here !
    };
Calling the API will require the http module, so import the module into main-page.js.
var http = require("http");
Inside the beers function, and using the http module, now make the API call.
For the needs of this tutorial, the beer catalog is a JSON file on
http://www.beer-tutorials.org/beers/beers.json.
    http.getJSON("http://www.beer-tutorials.org/beers/beers.json").then(function(r) {

        console.log(JSON.stringify(r));

    }, function(e) {

        console.log(e);

    });
The code above makes the API call.
When running an app in the emulator you will need to run ‘adb logcat’ to check log messages.
Save changes and run the app on the emulator. Click the get beer list button and the returned result from the server should be visible in terminal.
Next use the response returned to push the beers information to an array.
An observable array is required to create and detect changes to a collection of things.
Bind this same observable array to the view so that the view updates whenever a change occurs.
To create the observable array, add these variable declarations to main-page.js :
    var observableArray = require("data/observable-array");
    var beerList = new observableArray.ObservableArray([]);
Then, inside of the http.getJSON().then() method, iterate through the returned data. Push each beer object into the beerList observableArray:
function beers(args) { http.getJSON(“http://www.beer-tutorials.org/beers/beers.json”).then(function (r) { for (var i = 0; i< r.length; i++) { var beer = { name: r[i].name, description: r[i].description, alcohol: r[i].alcohol } beerList.push(beer); } }, function (e) { console.log(e); } ); }
Binding data to the UI
Once the data is in the beersList array, bind it to the UI. For displaying the data, create a ListView in main-page.xml, underneath the existing Button element.
    <ListView>
        <ListView.itemTemplate>
          <StackLayout orientation="vertical">
            <Label id="name" class="beerName" />
            <Label id="description" textWrap="true" />
          </StackLayout>
        </ListView.itemTemplate>
    </ListView>
Bind the beersList array to the list view:
    <ListView items="{{ beerList }}">
    <ListView.itemTemplate>
      <StackLayout orientation="vertical">
        <Label id="name" text="{{name}}" class="beerName" />
        <Label id="description" text="{{ description }}" textWrap="true" />
      </StackLayout>
    </ListView.itemTemplate>
    </ListView>
To make our list more user friendly, we also add some CSS to app.css:
    .beerName {
      font-size: 20;
    }
For the beersList array to be available across the view, set the beersList array in the observable module. Do this by importing an observable module and using it to create an observable object.
    var observableModule = require("data/observable");
    var pageData = new observableModule.Observable();
In the pageLoaded function, set the images array to the observable module and add the observable module to the page context.
    function pageLoaded(args) {
        var page = args.object;
        pageData.set("beerList", beerList);
        // it links an xml "beerList" variable to a js beerList variable
        page.bindingContext = pageData;
    }
Getting the beers pics
We can also extract the image URL from the received JSON :
    var beer = {
      name: r[i].name,
      description: r[i].description,
      alcohol: r[i].alcohol,
      img: "http://beertutorials.github.io/website/"+r[i].img
    }
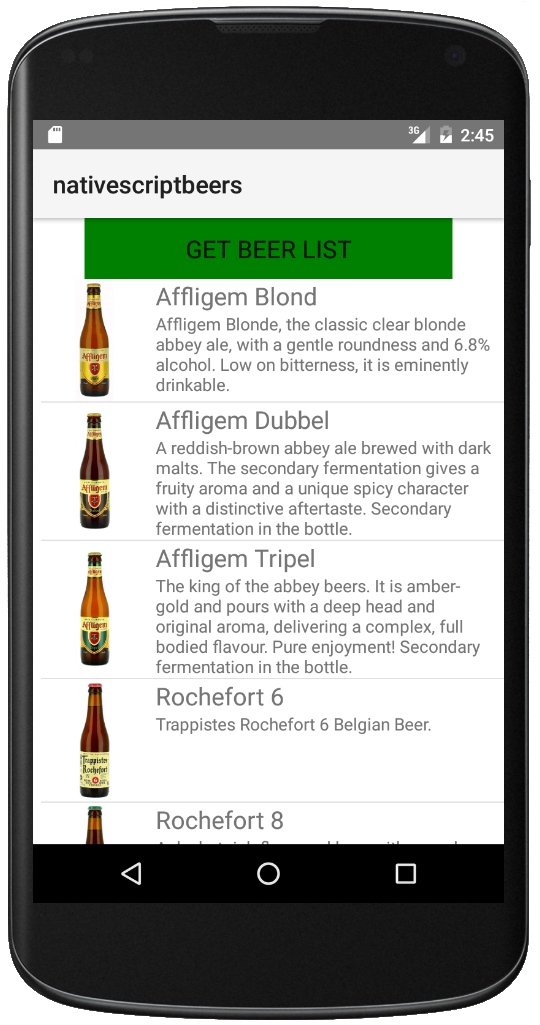
And then we add the image to the ListView.itemTemplate:
    <ListView.itemTemplate>
      <StackLayout orientation="horizontal">
        <Image width="100px" height="100px" src="" />
        <StackLayout orientation="vertical">
          <Label id="name" text="" class="beerName" />
          <Label id="description" text="" textWrap="true" />
        </StackLayout>
      </StackLayout>
    </ListView.itemTemplate>
Let’s forget the Button
Let’s call for the beer list without button. We are going to use application’s lifecycle method onLaunch
on app.js:
application.on(application.launchEvent, function (args) {
   var mainPage = require("./main-page");
   mainPage.beers();
})

application.start();
application.start() must be the last instruction of the app.js file, any instruction after it would be ignored in some platforms.
Now you can delete the Buttom from main-page.xml.
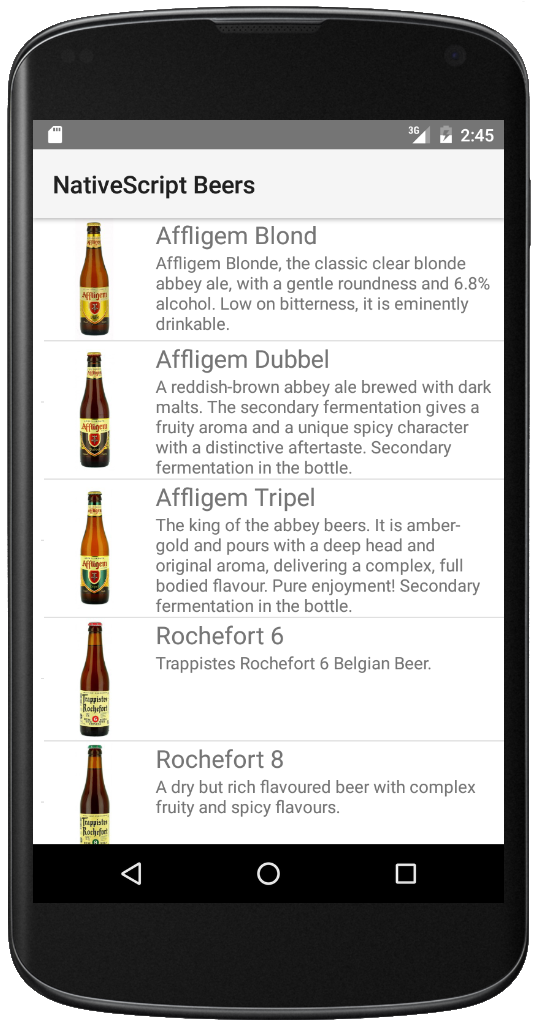
And how about the ActionBar title?
To have access to the ActionBar with the application title, you only need to explicitly declare it in main-page.xml:
<Page xmlns="http://schemas.nativescript.org/tns.xsd" loaded="pageLoaded">
  <Page.actionBar>
    <ActionBar title="NativeScript Beers" android.icon="res://ic_test"/>
  </Page.actionBar>